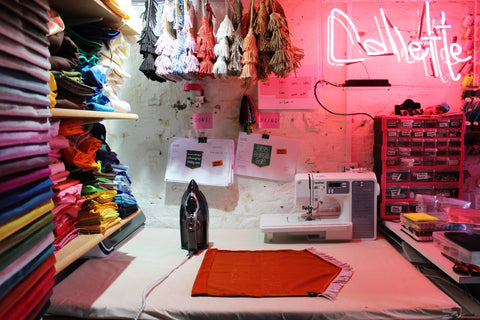
Ironing the Velvet:
Set Up the Iron: Ensure your iron is clean and in good working condition. Set it to the lowest heat setting, typically labeled "Low" (one dot) or "Silk." If your iron has a specific setting for velvet, use that. Make sure the steam function is turned on. It is possible to iron medium heat (two dots) if ironing from the back, never iron medium heat from the front.
Prepare the Surface: Lay a clean, flat surface, like an ironing board or a table, for larger banners you can work in sections or if you have a large blanket, towel or even a duvet this can be used to lay the banner on on the floor.
Iron with Caution: Lay the velvet garment or fabric flat on the cloth-covered surface, I always recommend to iron with the wrong side (back) facing up. It is good to place a clean, white cotton cloth over the velvet, creating a protective barrier but this isn't a step I take in my studio when creating banners. Before ironing the entire garment or fabric, test a small, inconspicuous area to ensure the heat and steam settings are appropriate and won't damage the velvet. If the test area seems fine, proceed to the next step.
Iron Gently: Using your iron on the lowest heat setting, gently press the iron onto the cloth-covered velvet. It is best to not slide the iron back and forth as you would with other fabrics; this can crush the velvet fibers. Instead, lift and reposition the iron to press out wrinkles. Apply minimal pressure. If wrinkles persist, use the steam function of the iron by holding it a short distance above the cloth-covered velvet. The steam will help relax the fibers, making it easier to remove wrinkles.
Hang or Lay Flat to Cool: After ironing, let the velvet garment or fabric cool and air out. Hanging it on a dowel or laying it flat is ideal. Avoid folding it immediately, as this can cause new wrinkles to form.
Transporting: I always recommend rolling the banner up or keeping it flat to avoid creases on your big day!

Steaming the Velvet:
Hold the steamer nozzle a few inches away from the velvet banner's surface. Begin steaming from the top and work your way down in vertical strokes. Do not press the steamer directly onto the velvet.
Use Gentle Strokes: Glide the steamer slowly and gently over the fabric. The steam will help relax the velvet's fibers and remove wrinkles.
Check for Wrinkles: After steaming, inspect the banner for any remaining wrinkles or creases. If needed, repeat the steaming process in the problem areas.
Allow to Air Dry: After steaming, let the velvet banner air dry in a well-ventilated area.
Transporting: I always recommend rolling the banner up or keeping it flat to avoid creases on your big day! 
Click here to view my blog post on where to purchase a banner rod.

About the Author
Crema, dark chicory barista ut siphon, bar a cup as bar brewed. Arabica turkish cinnamon, latte medium a milk variety grinder doppio whipped. Strong white mug acerbic chicory skinny robusta.